Level Specifications
Engine:
Number of Players:
Genre:
Pick Ups:
Development Time:
Assets Used:
Unreal Engine 4
One
Action
Six
Two months
VFX Weather Pack by tharlevfx, Medieval Village by PolyPixel
Quick Navigation
Village Combat
This level was constructed in Unreal Engine 4 over the course of two months. It was created to leverage both indoor and outdoor areas.
The level consists of three main play spaces, an exterior area, a small shed, and a larger indoor area containing armor and weapons. The large exterior area is additionally broken into two separate parts. An area to explore and allow the player to orient themselves to their environment, and another where the main combat encounter takes place.
Combat Area
It was vital that the combat area was big enough to accommodate the player rolling and swinging without colliding with the bounds of the level while additionally providing a maneuverable space for the AI. To achieve these, I first measured the radius of each of the players moves, plotted out a minimum area, and then created a small test chamber. It was important that the enemy patrol path inevitably intersect with the player, and that once within the bounds of the combat area, that the player would be detected.
Leading the Player
Another challenge of this map was to create a diagetic flow to the level, and to draw the players attention to side areas in appropriate but unobtrusive ways. To achieve this, I used lines intersected by objects in the environment to lead the player to places of note, such as the main building off to the right. I deliberately disrupted the flow of lines at the fence and created a break pointing inwards towards the building.
Additionally, lighting was critical to not only set the tone of the level, but successfully navigate the player towards the enemy encounter. The use of brighter areas highlighting the back of the map was employed to create a diagetic way of showcasing the critical path.


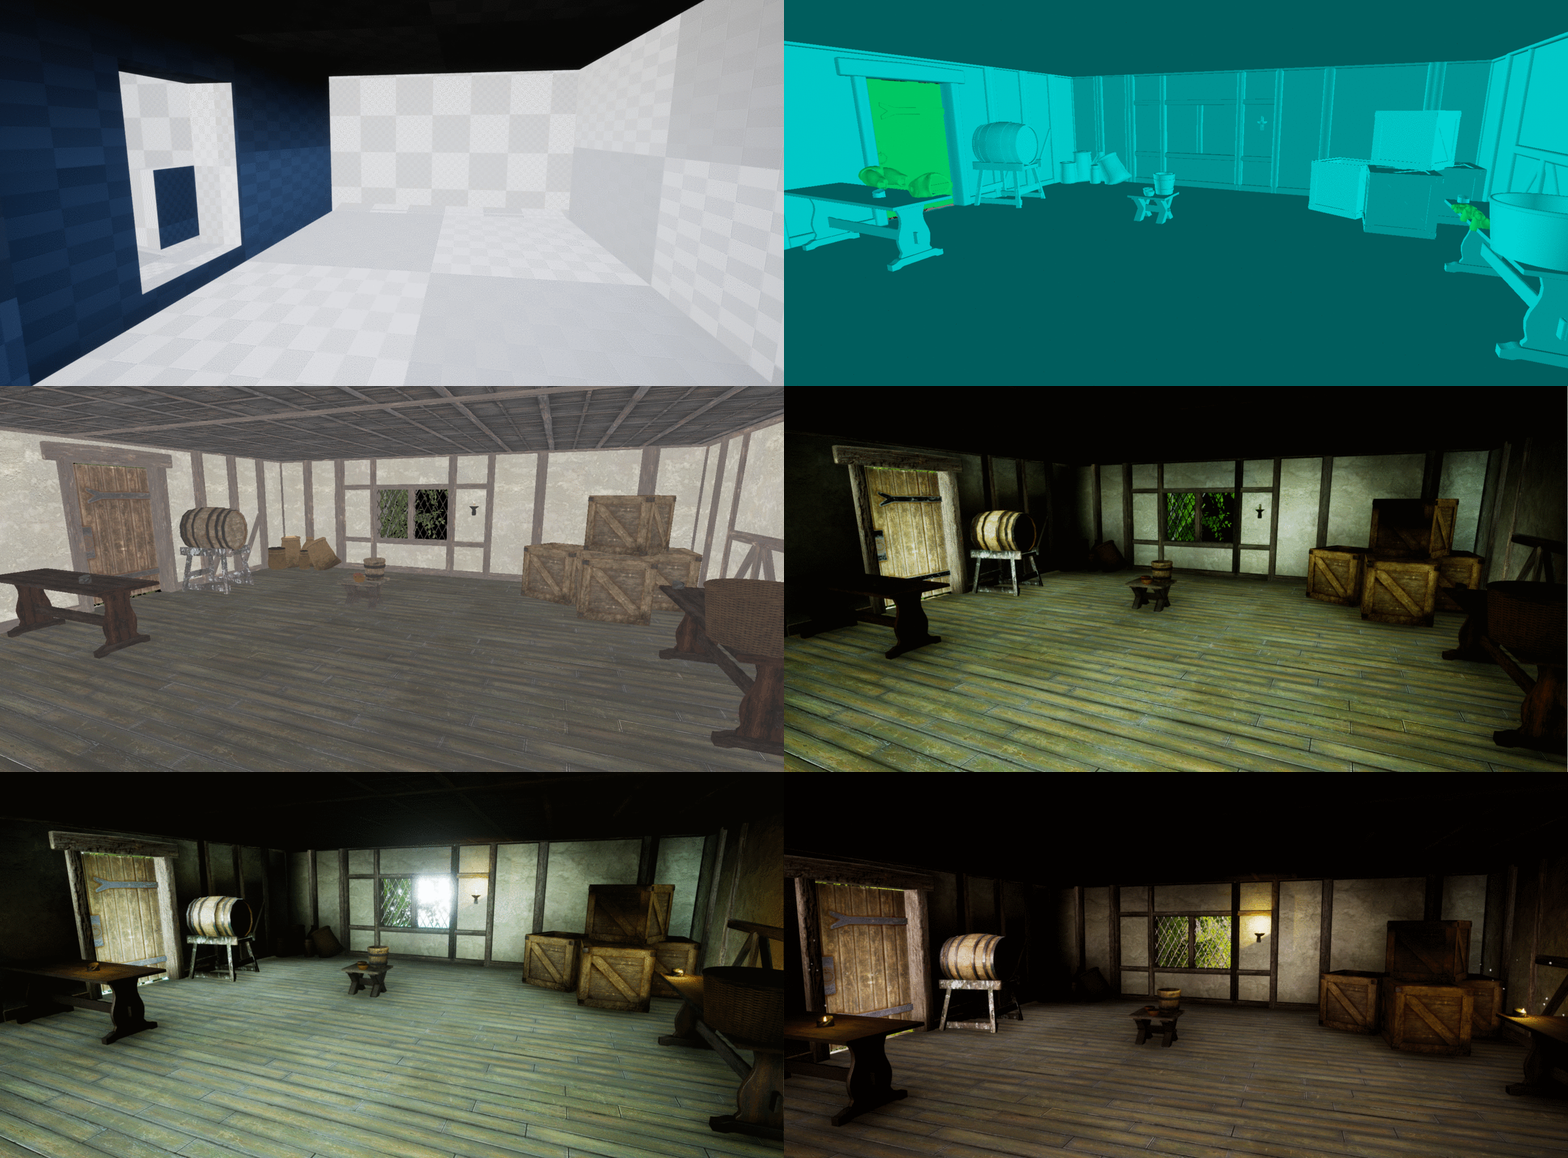
Lighting, Asset, and Effects Process
The gif shows the process I went through to achieve the finalized lighting and effects. The steps used to produce the final level were:
1) Remove all default lights and effects from the grey box
2) Check the model collision and blocking
3) Add in first pass ambient light and directional light
4) Tweak main light source and ambience, then build and place reflection spheres
5) Adjust light map resolution, light intensity and begin post processing effects
6) Finalize post processing, add environment effects
7) Final pass on all lighting and effects
Lighting Problems to Solve
I wanted this map to have a very distinct feel the moment the player was dropped into it, but I had to keep in mind the readability of the overall environment. One problem I encountered in early builds of the level was overexposed lighting blowing out the player view if the rotated the camera too far towards the sky. It created a genuinely disorienting moment, and was the product of dynamic eye adaptation. Eventually, as a work around after tweaking the settings, I focused on raising the ambient light, and lowering the intensity of the directional light. It took many iterations of a very flat looking scene before I managed to create the right balance between dark and light in the level.


The finalized interior of the blacksmith building where the player can find armor.

And exterior shot of the house where players can find health items
